Mudguard Modifications
Many years ago (1983), I bought a brand new Honda VF750SC to replace my trusty CX500.� This became our touring machine for the next 5 years.� One disadvantage with the bike was that the chrome �sports� front mudguard was almost useless in keeping the crud from the cam cover on the front pair of cylinders and most of the rest of the bike too.� I searched for some time for a more suitable replacement and eventually settled on a glassfibre copy of a GoldWing front guard.
This came in an un-drilled state and was pigmented black.� I fitted it to the bike after careful measurement and drilling, but left it in its raw state in order to check that it didn�t catch anything in use and also to make sure that the bike was not adversely affected by the wind.� A few weeks later I had to change the tyres, and to my horror, after paying for both tyres and fitting the rear wheel, when I tried the front one, it would not fit inside the mudguard. (the same section tyre, but a different manufacturer)� I had no choice but to remove the mudguard, strap it to the rear seat and ride home without one (tut,tut!).� On arriving home I refitted the chrome guard and hurled the glassfibre one into a far dark corner of the shed and cursed myself for wasting �20.� Being a Yorkshireman,� (now saving hard to become a Scotsman!) this unuseable mudguard kept coming back into my thoughts and my original problem of trying to keep the bike clean, was still not resolved.�
I took a hacksaw, with a coarse blade rotated through 90 degrees and cut the guard in two from front to back along its whole length.� Having estimated that 10mm extra width would be sufficient, I pop-rivetted 5 aluminium straps, spaced along the outer surface, across the width of the guard, separating it by that amount.� The next stage, after thoroughly cleaning and degreasing the inner surface, was to lay up three layers of chopped strand fibre matting with resin to the inside of the guard.� After curing, the pop rivets were drilled out and the straps removed and the whole thing tested for fit, which was spot on, with enough clearance for the tyre plus a stone or two.�
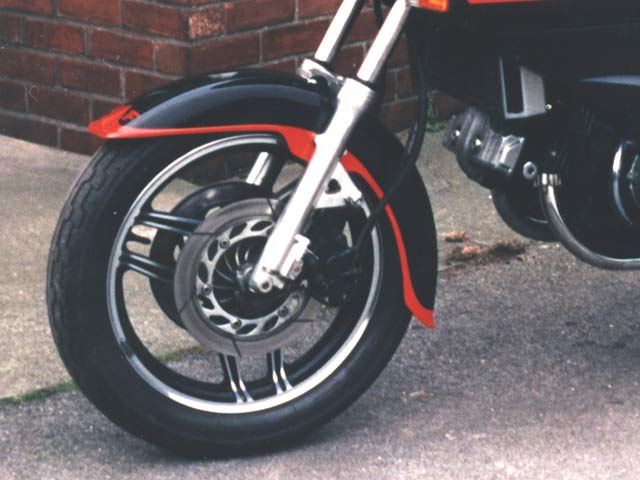
The cosmetics now needed some consideration; if I were to just fill up the gap, I would end up with a cross section with two curves joined together by a flat.� It would need some profiling to achieve the correct crowned shape afterwards, so that it looked more like a factory part.�� The initial stage of this shaping was achieved by cutting a template out of a piece of square section plastic guttering and filing to the desired profile.� After mixing and applying the body filler in sections, it was a simple matter to drag the template towards me over the uncured filler, thus shaping it as I went.� This was followed by a light skim of filler and careful rubbing down, to correct any small imperfections, and was then ready for the priming and painting stages.� As the bike was black with red decals, I opted to do the guard in matt black (all I had to hand at the time) and then mask a red border with fine line masking tape and the letters VF at the forward edge and then follow this with clear lacquer to get the shine.� The result was even better than expected and started many a conversation with folks in the know, whenever it was parked up.
�
�