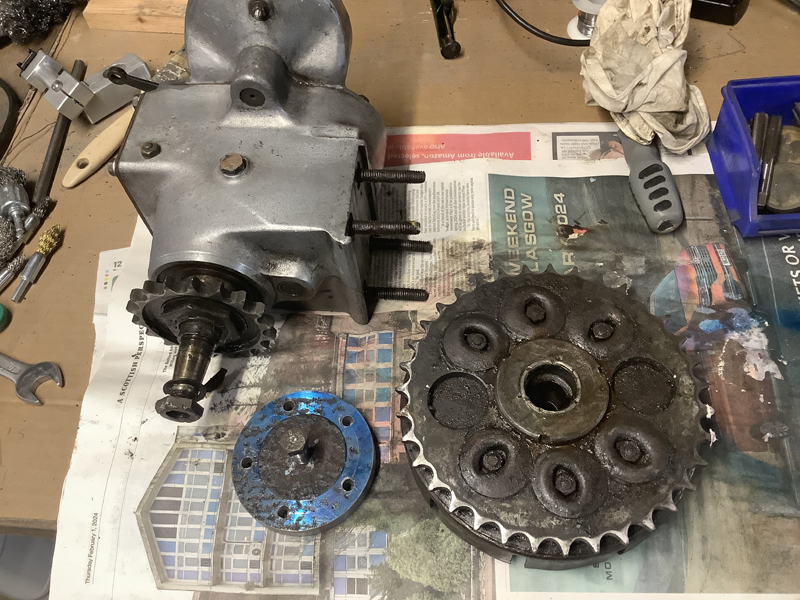
1926 Ariel 550 Clutch
I was asked recently by a friend if I could help him with the removal and dismantling of the clutch on this Ariel, which is nearly 100 years old. He had managed to remove the gearbox and clutch as a unit but couldn't separate the two. One of the 5 clutch spring posts was sheared off and the plates were in a sorry state, so it had to come apart to be re-furbished. I set to and made an extractor from a piece of 1/2" very rusty plate (never throw anything away - you just might need it someday!).
The worst part was making this scrap rectangular plate into a round piece - a nice slice of round bar from the Smithy in Sandwick would have taken less time but that was not an option on a Sunday! The clutch came off without drama using the home-made tool - my Ryobi battery operated rattle gun soon saw to that! The bigger problem was now that the centre section is fastened to the outer drum with a threaded collar with cut-outs for a 'C' spanner or 3 pronged tube spanner. The centre section revolves in the outer drum on rollers, so has to be prevented from rotation in some way to enable the collar to be unscrewed. It couldn't be gripped in a vice or even the chuck on my lathe, as the outer drum gets in the way. Again, raiding the scrap metal bin, I found a very thick walled piece of tube and was able to bore that out to accept the centre section with the addition of 2 'drive pegs' to fit the clutch plate grooves.
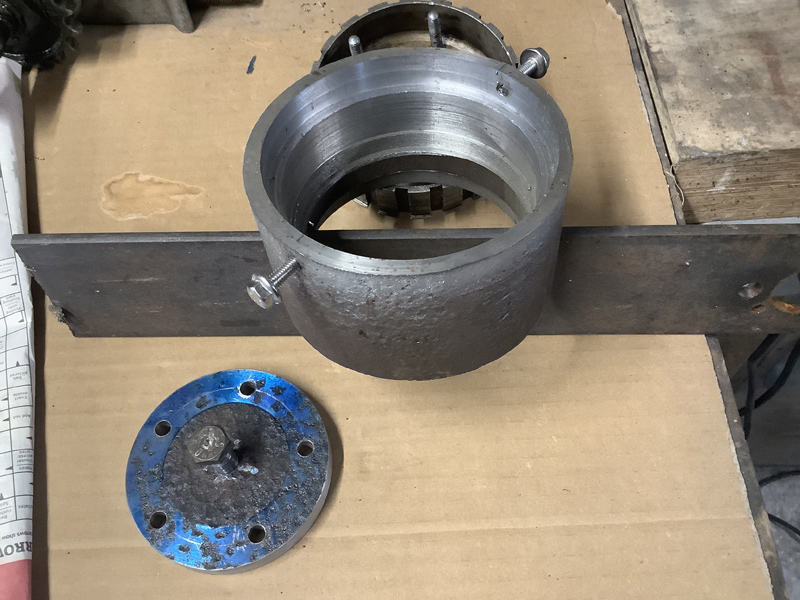
Unfortunately, that tube was too big to clamp in the vice to prevent it rotating when the collar was unscrewed, so I had to cut 2 slots in the opposite end to drop over a piece of steel plate, which could be clamped in the vice.
The next time-consuming job was to make a 3 pronged device to undo the thing - which was also 'staked' to prevent it vibrating loose in service. Another conundrum was whether this was a left-hand or right-hand thread there was no easy way to tell! A phone call to Draganfly Autos who put me in touch with the Chairman of the Ariel Owners Club who has a few of these same bikes, who kindly found an old unit in his stash of parts and verified that it was, indeed a right-hand thread! Rather than set up the milling machine and rotary table, I just hack-sawed and filed the waste away for the 3 pegs after I had turned the shape. I also drilled and filed the square hole for the rattle gun.
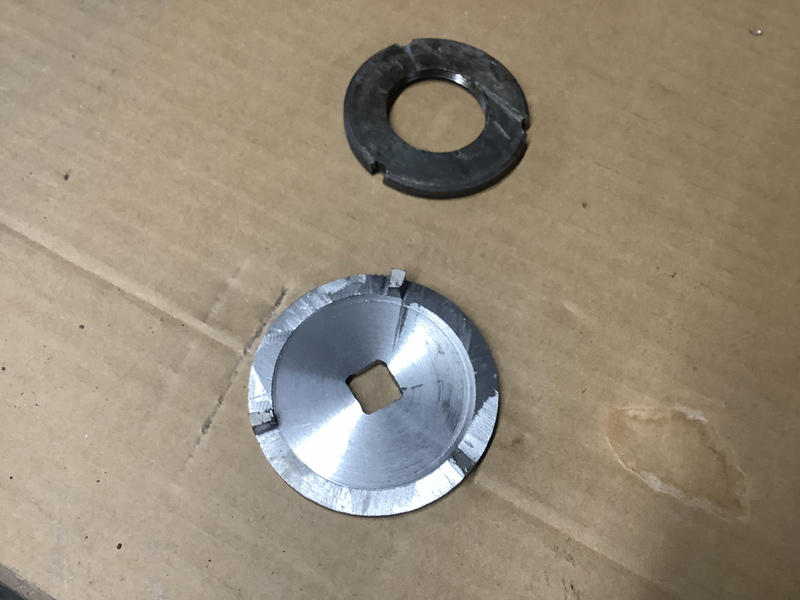
On the subject of rattle guns (impact wrenches) I have struggled for many years with breaker bars and extension tubes in an effort to remove stubborn nuts and bolts but these devices make it so much easier.
With everything now dismantled, Richard, the owner collected everything, including the home made tools, ready for cleaning and careful re-assembly. A very satisfying but time consuming result and no doubt special workshop tools would have once been available from the Factory to carry out these tasks.